In this tutorial, we will host a Git service on our cloud server.
A Git service can be installed relatively quickly. However, for secure and productive use, further settings are required on the server. In addition, the Git server should be addressed under a subdomain and not take up the entire cloud resource.
The goal of this tutorial is to host Gitea under an encrypted subdomain in a subfolder: https://git.linuxserversetup.com/gitea.
If you want to make the Git server less obvious, you can choose neutral names for the subdomain and subfolder. A subfolder is less readily discoverable than a subdomain listed in public DNS data, but this only reduces accidental discovery. It is not an access control and does not replace authentication or a restrictive Gitea configuration.
We start by preparing a subdomain with TLS so that we can then install any Git service. As version control software with graphical web interface we take Gitea. It is free and open source. The procedure to implement Gitea is actually clear, but allows many settings in detail. The subtleties you can adjust in the configuration file and via the web interface for you.
How to enter a subdomain into the DNS zone file has already been described in Configure DNS records.
As an example I name the subdomain git. However, for reasons mentioned above, it makes sense to assign a name that is not so obvious. The A-record for this would be:
git IN A 116.203.69.89
In my case the final zone file looks like this:
$ORIGIN linuxserversetup.com.

; SOA Records
$TTL 86400
@    IN  SOA  hydrogen.ns.hetzner.com. dns.hetzner.com. (
      2021123100  ; serial
      86400       ; refresh
      10800       ; retry
      3600000     ; expire
      3600        ; negatives caching
)

; NS Records
@    IN  NS  hydrogen.ns.hetzner.com.
@    IN  NS  oxygen.ns.hetzner.com.
@    IN  NS  helium.ns.hetzner.de.

; MX Records
@    IN  MX  10 mail

; A Records
@    IN  A  116.203.69.89
mail IN  A  116.203.69.89
www  IN  A  116.203.69.89
dev  IN  A  116.203.69.89
git  IN  A  116.203.69.89
Input the webroot for git.linuxserversetup.com: /var/www/com.linuxserversetup.git
The new certificates should then be located under /etc/letsencrypt/live/git.linuxserversetup.com/. More precisely, links to the actual files are located there.
__$ sudo ls -la /etc/letsencrypt/live/git.linuxserversetup.com
Change Nginx configuration file to HTTPS
We can now implement the certificates in the configuration file we created earlier and make the following additional changes:
HTTPS is to be enforced
TLS Implementation
git.linuxserversetup.com should reply with the empty HTML page
git.linuxserversetup.com/gitea redirects to the internal port 3800
The default port of Gitea is actually 3000. I will change that later to 3800, so here is already the preparation for that.
We had already done the MySQL installation in a previous chapter. Now we only need to create a MySQL user gitea with a database of the same name. The password is here example gitea123:
__$ sudo mysql
__gt CREATE USER 'gitea'@'localhost' IDENTIFIED BY 'gitea123';
__gt GRANT ALL PRIVILEGES ON gitea.* TO 'gitea'@'localhost';
__gt FLUSH PRIVILEGES;
__gt CREATE DATABASE gitea;
__gt exit;
Download and configure Gitea
We obtain Gitea from the official source. At the time of writing, the current version is 1.27.1. Before using the commands later, check the linked page for the current version and replace the version number in all file names if necessary.
We first download the binary and its signature to /tmp, verify the signature with Gitea's published key, and only then install the binary under /usr/local/bin/gitea:
We create a folder structure for Gitea under /var/lib. There we also place a folder for custom settings that overwrites the default configuration. This allows Gitea to be updated without resetting the custom settings.
With the first start the software is installed and thereby further system files are created in /etc/gitea. After that, the directory permissions can be changed again. We will come back to this later.
To make Gitea start automatically, we create a Linux service /etc/systemd/system/gitea.service. A standard file can be found here for example githubusercontent.com/go-gitea.
We create the file:
__$ sudo nano /etc/systemd/system/gitea.service
With this content:
/etc/systemd/system/gitea.service
[Unit]
Description=Gitea (Git with a cup of tea)
After=syslog.target
After=network.target
###
# Don't forget to add the database service dependencies
###
#
Wants=mysql.service
After=mysql.service
#
#Wants=mariadb.service
#After=mariadb.service
#
#Wants=postgresql.service
#After=postgresql.service
#
#Wants=memcached.service
#After=memcached.service
#
#Wants=redis.service
#After=redis.service
#
###
# If using socket activation for main http/s
###
#
#After=gitea.main.socket
#Requires=gitea.main.socket
#
###
# (You can also provide gitea an http fallback and/or ssh socket too)
#
# An example of /etc/systemd/system/gitea.main.socket
###
##
## [Unit]
## Description=Gitea Web Socket
## PartOf=gitea.service
##
## [Socket]
## Service=gitea.service
## ListenStream=
## NoDelay=true
##
## [Install]
## WantedBy=sockets.target
##
###

[Service]
# Modify these two values and uncomment them if you have
# repos with lots of files and get an HTTP error 500 because
# of that
###
#LimitMEMLOCK=infinity
#LimitNOFILE=65535
RestartSec=2s
Type=simple
User=git
Group=git
WorkingDirectory=/var/lib/gitea/
# If using Unix socket: tells systemd to create the /run/gitea folder, which will contain the gitea.sock file
# (manually creating /run/gitea doesn't work, because it would not persist across reboots)
#RuntimeDirectory=gitea
ExecStart=/usr/local/bin/gitea web --config /var/lib/gitea/custom/conf/app.ini
Restart=always
Environment=USER=git HOME=/home/git GITEA_WORK_DIR=/var/lib/gitea
# If you install Git to directory prefix other than default PATH (which happens
# for example if you install other versions of Git side-to-side with
# distribution version), uncomment below line and add that prefix to PATH
# Don't forget to place git-lfs binary on the PATH below if you want to enable
# Git LFS support
#Environment=PATH=/path/to/git/bin:/bin:/sbin:/usr/bin:/usr/sbin
# If you want to bind Gitea to a port below 1024, uncomment
# the two values below, or use socket activation to pass Gitea its ports as above
###
#CapabilityBoundingSet=CAP_NET_BIND_SERVICE
#AmbientCapabilities=CAP_NET_BIND_SERVICE
###

[Install]
WantedBy=multi-user.target
It is basically the default file mentioned above with only two changes:
Wants=mysql.service and After=mysql.service are activated.
The path to the web configuration file points to your own settings: /var/lib/gitea/custom/conf/app.ini.
The remaining file is the web configuration file /var/lib/gitea/custom/conf/app.ini. Gitea has also published a standard app.example.ini file for this purpose. This file contains all possible options, but we do not need to use all of them. The following example also contains optional entries to make later editing easier.
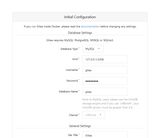
Gitea is now ready for its first launch. With INSTALL_LOCK = false, this starts the installation process. The settings entered in the web installer will automatically overwrite the last created configuration file /var/lib/gitea/custom/conf/app.ini. So we call the Gitea web address https://git.linuxserversetup.com/gitea and use it to create an administrator account. The "Email notifications" option can also be enabled at this point (ENABLE_NOTIFY_MAIL). This will notify repository observers about events via email.
One more note: The next section describes how to disable the public registry. This can also be set already now in the installation process via the web interface.
Install Gitea and create administrator:Gitea Web InstallerError page after installation
After the installation we land on an error page, which is typical. The page then just needs to be reloaded.
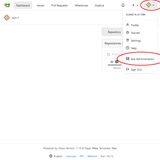
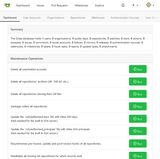
Gitea dashboardOpen Gitea settingsGitea settings
The Git server is now ready and operational.
If the /etc/gitea folder still exists after installation, which may not be the case in newer Gitea versions, you can lower the access rights of it:
__$ sudo chmod 750 /etc/gitea
Disable public registration
If you don't want to share Gitea publicly, you should enable DISABLE_REGISTRATION registration: