Install Postfix
The mail server software used is Postfix. This mail transfer agent was developed in the late nineties and is still one of the most used mail servers. Postfix is one of the "easy" mail servers to administer.
Installation
Let's install the Postfix software as usual with apt:
__$ sudo apt install -y postfix
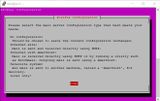
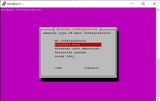
It starts a graphical installation routine, where we already make the two most important settings:
- General type of mail configuration:
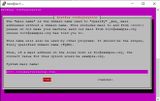
Internet Site - System mail name:
srv1.linuxserversetup.com


Postfix configuration files
After installation, all Postfix configuration files are located under /etc/postfix:
__$ sudo ls -l /etc/postfix
Output:
total 120
-rw-r--r-- 1 root root    60 Jan  4 16:43 dynamicmaps.cf
drwxr-xr-x 2 root root  4096 Jan  3 06:58 dynamicmaps.cf.d
-rw-r--r-- 1 root root  1433 Jan  4 16:43 main.cf
-rw-r--r-- 1 root root 27120 Jan  4 16:43 main.cf.proto
lrwxrwxrwx 1 root root    31 Jan  4 16:43 makedefs.out -> /usr/share/postfix/makedefs.out
-rw-r--r-- 1 root root  6208 Jan  4 16:43 master.cf
-rw-r--r-- 1 root root  6208 Jan  4 16:43 master.cf.proto
-rw-r--r-- 1 root root 10268 Jan  3 06:58 postfix-files
drwxr-xr-x 2 root root  4096 Jan  3 06:58 postfix-files.d
-rwxr-xr-x 1 root root 11532 Jan  3 06:58 postfix-script
-rwxr-xr-x 1 root root 29872 Jan  3 06:58 post-install
drwxr-xr-x 2 root root  4096 Jan  3 06:58 sasl
The two important ones are mainly master.cf and main.cf. We will make our manual changes only in main.cf. Before we do that, we'll check to make sure Postfix is running correctly and our MX record is retrievable from the DNS file.
Postfix status
Let's check if the installation was successful and the Postfix service is running properly:
__$ sudo service postfix status
If there are no problems you should see the Active: active entry.
DNS MX (Mail Exchange) Resource Record
Using the dig command, we retrieve our own DNS record and check if there is an entry for a mail exchange stored:
__$ dig linuxserversetup.com mx
Output:
; <<>> DiG 9.16.1-Ubuntu <<>> linuxserversetup.com mx
;; global options: +cmd
;; Got answer:
;; ->>HEADER<<- opcode: QUERY, status: NOERROR, id: 23128
;; flags: qr rd ra; QUERY: 1, ANSWER: 1, AUTHORITY: 0, ADDITIONAL: 1

;; OPT PSEUDOSECTION:
; EDNS: version: 0, flags:; udp: 65494
;; QUESTION SECTION:
;linuxserversetup.com.          IN      MX

;; ANSWER SECTION:
linuxserversetup.com.   70966   IN      MX      10 mail.linuxserversetup.com.

;; Query time: 3 msec
;; SERVER: 127.0.0.53#53(127.0.0.53)
;; WHEN: Wed Jan  4 16:55:14 UTC 2022
;; MSG SIZE  rcvd: 70
In the "Answer Section" should be the URL mail.linuxserversetup.com. This is how we had configured it in the DNS records chapter.
If Postifx is active and the MX record is set correctly, we can do our email forwarding.
DNS Reverse Hostname
The incoming emails that we send back out through forwarding should carry the correct hostname for the reverse lookup. Let's see if it is stored correctly, otherwise we change it in the file /etc/postfix/main.cf:
__$ sudo nano /etc/postfix/main.cf
The myhostname option should have the value srv1.linuxserversetup.com. The complete file will look like this:
/etc/postfix/main.cf
# See /usr/share/postfix/main.cf.dist for a commented, more complete version

# Debian specific:  Specifying a file name will cause the first
# line of that file to be used as the name.  The Debian default
# is /etc/mailname.
#myorigin = /etc/mailname

smtpd_banner = $myhostname ESMTP $mail_name (Ubuntu)
biff = no

# appending .domain is the MUA's job.
append_dot_mydomain = no

# Uncomment the next line to generate "delayed mail" warnings
#delay_warning_time = 4h

readme_directory = no

# See http://www.postfix.org/COMPATIBILITY_README.html -- default to 2 on
# fresh installs.
compatibility_level = 2

# TLS parameters
smtpd_tls_cert_file=/etc/ssl/certs/ssl-cert-snakeoil.pem
smtpd_tls_key_file=/etc/ssl/private/ssl-cert-snakeoil.key
smtpd_tls_security_level=may

smtp_tls_CApath=/etc/ssl/certs
smtp_tls_security_level=may
smtp_tls_session_cache_database = btree:${data_directory}/smtp_scache

smtpd_relay_restrictions = permit_mynetworks permit_sasl_authenticated defer_unauth_destination
myhostname = srv1.linuxservrsetup.com
alias_maps = hash:/etc/aliases
alias_database = hash:/etc/aliases
myorigin = /etc/mailname
mydestination = $myhostname, srv1.linuxservrsetup.com, localhost.com, localhost
relayhost =
mynetworks = 127.0.0.0/8 [::ffff:127.0.0.0]/104 [::1]/128
mailbox_command = procmail -a "$EXTENSION"
mailbox_size_limit = 0
recipient_delimiter = +
inet_interfaces = all
inet_protocols = all
Configure virtual email aliases
Since we are not creating mailboxes, but only receiving and forwarding email, we need a file that lists these mappings. In the folder /etc/postfix we put a file named virtual:
__$ sudo nano /etc/postfix/virtual
As an example, I write the following in the file and save it. As always: enter your data at mail@example.com.
/etc/postfix/virtual
# Forwarding Addresses (from -> to)
tom@linuxservrsetup.com mail@example.com
jerry@linuxservrsetup.com mail@example.com
The mail server should receive emails for tom@linuxservrsetup.com and jerry@linuxservrsetup.com and forward them to mail@example.com. The first line starts with a hash (#) and is just a comment.
The notation for multiple recipients would be the following:
/etc/postfix/virtual
# Forwarding Addresses (from -> to)
tom@linuxservrsetup.com mail-1@example.com, mail-2@example.com
jerry@linuxservrsetup.com mail@example.com
An email to tom@linuxservrsetup.com would thus be forwarded to mail-1@example.com and mail-2@example.com.
We still need to tell Postfix the domain for the virtual aliases and the above file with the mappings. For this we open the corresponding configuration file /etc/postfix/main.cf:
__$ sudo nano /etc/postfix/main.cf
And add to the end of the file:
Excerpt from /etc/postfix/main.cf
...
# virtual alias
virtual_alias_domains = linuxservrsetup.com
virtual_alias_maps = hash:/etc/postfix/virtual
The complete file will look like this:
/etc/postfix/main.cf
# See /usr/share/postfix/main.cf.dist for a commented, more complete version

# Debian specific:  Specifying a file name will cause the first
# line of that file to be used as the name.  The Debian default
# is /etc/mailname.
#myorigin = /etc/mailname

smtpd_banner = $myhostname ESMTP $mail_name (Ubuntu)
biff = no

# appending .domain is the MUA's job.
append_dot_mydomain = no

# Uncomment the next line to generate "delayed mail" warnings
#delay_warning_time = 4h

readme_directory = no

# See http://www.postfix.org/COMPATIBILITY_README.html -- default to 2 on
# fresh installs.
compatibility_level = 2

# TLS parameters
smtpd_tls_cert_file=/etc/ssl/certs/ssl-cert-snakeoil.pem
smtpd_tls_key_file=/etc/ssl/private/ssl-cert-snakeoil.key
smtpd_tls_security_level=may

smtp_tls_CApath=/etc/ssl/certs
smtp_tls_security_level=may
smtp_tls_session_cache_database = btree:${data_directory}/smtp_scache

smtpd_relay_restrictions = permit_mynetworks permit_sasl_authenticated defer_unauth_destination
myhostname = srv1.linuxservrsetup.com
alias_maps = hash:/etc/aliases
alias_database = hash:/etc/aliases
myorigin = /etc/mailname
mydestination = $myhostname, srv1.linuxservrsetup.com, localhost.com, localhost
relayhost =
mynetworks = 127.0.0.0/8 [::ffff:127.0.0.0]/104 [::1]/128
mailbox_command = procmail -a "$EXTENSION"
mailbox_size_limit = 0
recipient_delimiter = +
inet_interfaces = all
inet_protocols = all

# virtual alias
virtual_alias_domains = linuxserversetup.com
virtual_alias_maps = hash:/etc/postfix/virtual
Final settings
A few more steps and it's done. The current Postfix process is still running with the old settings.
Postfix refers to an internal address table that we update with postmap:
__$ sudo postmap /etc/postfix/virtual
We restart the Postfix service so that the new settings are applied:
__$ sudo systemctl reload postfix
The mail server should start automatically when the server is restarted:
__$ sudo systemctl enable postfix
And of course, our firewall should allow Postfix to accept emails and send them out:
__$ sudo ufw allow Postfix
Done! Remains (as above) a final status check:
__$ sudo service postfix status
If the message is still Active: active, you can send a test email to your new address. In my case to tom@linuxservrsetup.com.