On Windows 10 and 11, we use PowerShell and the Windows OpenSSH client to connect to our Linux server. The same ssh commands also work in the Windows Command Prompt.
Alternatively, PuTTY can be used. PuTTY is a software that can also do other types of connections, such as Telnet. What is really practical is that profiles can be saved so that you do not have to enter the connection data again and again.
The OpenSSH client can also be used by IDEs, editors and database tools to connect directly to a server.
PowerShell can access local Windows drives directly. Later, we use this to load a private SSH key from a path such as D:\linux-server\keys\private-key.
First, we download the mini-program from the official download page. At the time of writing, the alt installation file is called: putty-64bit-0.76-installer.msi (64 bit version). Installing PuTTY is nothing special, so I'll omit instructions on how to do it.
When you open PuTTY after installation, you will see the "Session" page:
PuTTY Client
Putty SSH connection
PuTTY's appearance may seem a bit old-fashioned, but the program still does a great job. The more than 20 years old software is cult, where above all the inner values count!
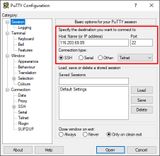
For the connection to our server we don't have to set much at all. We just need the "Session" page, where we enter the following:
Host Name (or IP address): 116.203.69.89 (server IP)
Port: 22
Connection type: SSH
PuTTY: Session settings
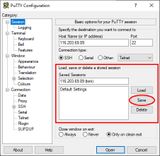
That is actually all! It makes sense to name the "Session" and save it, otherwise you would have to enter everything again the next time you start the program. To save just click "Save". An entry appears in the "Saved Sessions" list and with "Load" we can load these settings again.
Saved Sessions: 116.203.69.89 (tom) (optional: to save the session)
PuTTY: save sessionPuTTY: load session
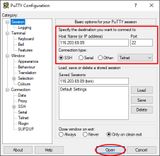
With a click on "Open" we start the connection setup:
PuTTY: connect
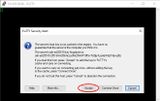
On the very first connection, we are asked whether the new connection is trusted and the address should be added to the list of known servers. Of course, we confirm this with yes.
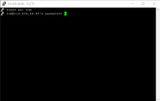
A black terminal window opens and after a short moment our OpenSSH server asks for our username.
Username: tom
If you are surprised that you are typing into the "blank" when entering a password: this is quite normal with Linux. There is no feedback for password entries.
accept unknown serverPutty: loginlogged in (welcome message)
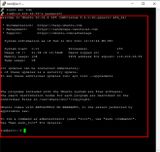
There should be a welcome message from the server. If bash displays the logged in user (tom@srv1:~$), then that is a sure sign of a successful login.
SSH with PowerShell
Open PowerShell and check OpenSSH
Press WIN+R, enter powershell and press Enter. Run the following command on your Windows computer to check the local SSH client:
ssh -V
A version number confirms that OpenSSH is available.
Connect to the Linux server
Enter the username and server IP after ssh. The default port is 22; use -p to specify a different port:
ssh tom@116.203.69.89
On the first connection, SSH displays the server fingerprint. The output looks similar to this:
The authenticity of host '116.203.69.89 (116.203.69.89)' can't be established.
ED25519 key fingerprint is SHA256:...
Are you sure you want to continue connecting (yes/no/[fingerprint])?
Compare the fingerprint with the one obtained from your server console before confirming with yes. Then enter your Linux user's password when prompted; the input is not displayed:
tom@116.203.69.89's password:
After a successful login, the server displays its welcome message and a Linux prompt, for example:
tom@srv1:~$
You are now connected to the Linux server. Commands in this SSH session run on the server; use a separate local PowerShell window to work with files on your Windows drives.